
François Andrieux
March 17, 2026
Build a To-Do App in Python with Dash (part 1)
Author: Fran Andrieux
In this tutorial, we’ll build a To-Do application 100% in Python using Plotly Dash and the community extension Dash Mantine Components. We’ll take an iterative approach, starting with the basics and gradually adding complexity as we understand why each piece is needed.
The tutorial is in two parts:
- Setup the layout, handle a minimal task list (part 1)
- Handle multiple lists and save tasks on page reload (part 2)
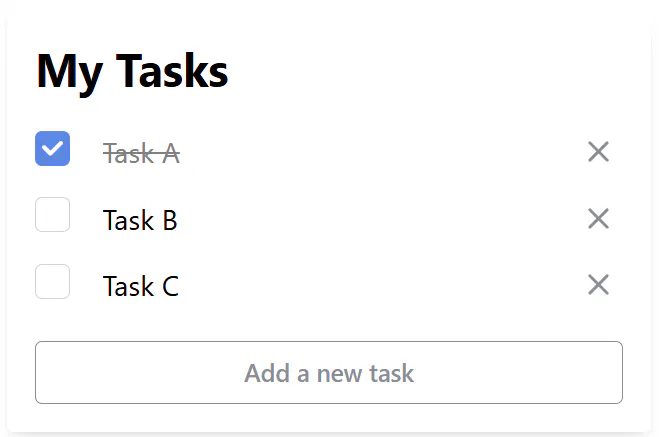
At the end of this article, you’ll know how to build the following To-Do app with Dash in python:
Introduction to Dash Mantine Components
For this project, we used Dash Mantine Components (DMC) version 0.15.1. Before we dive in, let’s understand what DMC offers us.
DMC is a component library that provides pre-built React components with a modern design system. It includes layout helpers (e.g. grid systems, centered container, etc.) and out-of-the-box components (e.g. Modal, Radio Button, Slider, etc.)
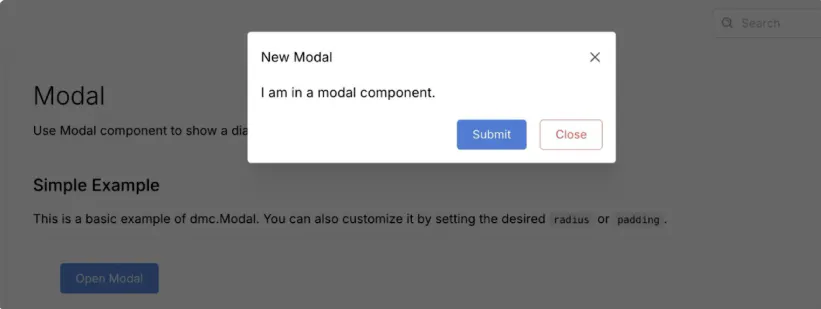
Some key components we’ll use:
- dmc.Container: A centered container with max-width
- dmc.Paper: A white background container with optional shadow
- dmc.Grid and dmc.GridCol: Flexbox-based grid system
- dmc.Button, dmc.Checkbox, dmc.ActionIcon: Interactive components
DMC uses several spacing and positioning attributes:
- mt: margin-top (e.g., mt="md" for medium margin-top)
- mb: margin-bottom
- px: padding on x-axis (left and right)
- p: padding on all sides
- Size values: “xs”, “sm”, “md”, “lg”, “xl” or numeric pixels
This will be useful for the rest of the article. If you encounter something you don’t understand, just go back here or search the component in DMC documentation.
Step 1: Setting up the layout
1. Data structure
Let’s start by defining how we’ll store our task data. This will actually help us shape the layout.
We want to create and save tasks. Each task should have a text content, and a checkbox status. That means having something like:
sample_list_data = {"title": "My Tasks","tasks_list": [{"content": "Task A","checked": True,},{"content": "Task B","checked": False,},{"content": "Task C","checked": False,},],}
From this structure, we can build the layout function to display tasks.
2. Creating reusable layout functions
A key aspect of our design is creating separate functions for each part of the layout. This isn’t just for code organization – it’s crucial for the dynamic nature of our app. Later, when we add or remove tasks, we’ll need to recreate portions of the layout dynamically. By having these functions, we can easily generate new task elements or update existing ones.
Let’s start with a function to render a single task using DMC’s Grid system:
def get_task(task_dict):""" Returns a single task layout """text = task_dict["content"]checked = task_dict["checked"]content = dmc.Grid([# Checkbox columndmc.GridCol(dmc.Checkbox(checked=checked,mt=2 # Align checkbox vertically),span="content" # Take only needed space),# Task text column - Using Input for editabilitydmc.GridCol(dmc.Text( # Wrap in Text component for consistent stylingdcc.Input(text,className="shadow-input", # Custom styling for inputdebounce=True # For callbacks)),span="auto" # Take remaining space),# Delete button columndmc.GridCol(dmc.ActionIcon(DashIconify(icon="tabler:x", width=20),variant="transparent",color="gray",className="task-del-button"),span="content"),],className="task-container")return content
We used dmc.Grid to easily get a 3-column structure. The first column has the checkbox, the second the text content, and the third has the delete task button.
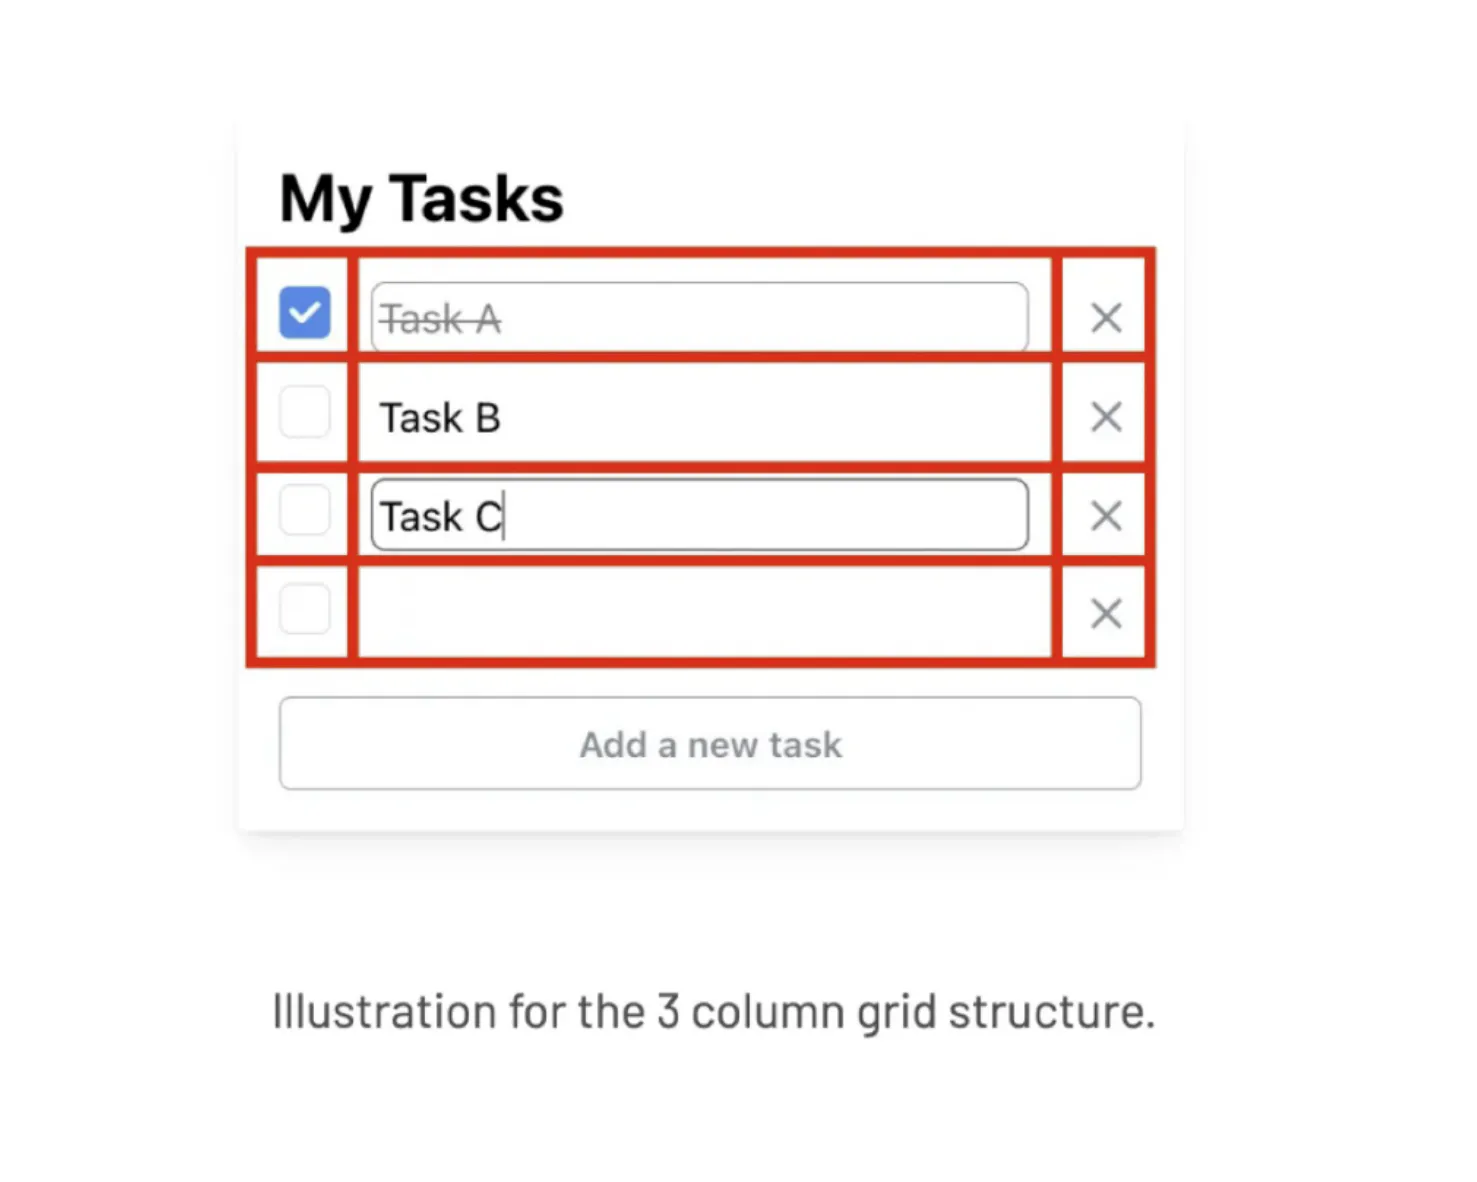
You might wonder why we use a dcc.Input wrapped in a dmc.Text component. The idea is that we want to modify the text just by clicking on it. The most similar example is the “contenteditable” elements in HTML: but they aren’t available in Dash.
Instead, we will style the app with some CSS to make the input look like normal text when it is not focused (i.e. being modified).
Note: the debounce attribute is used to trigger the input “update” event when the user finishes typing, not every time a key is pressed. In this case, it offers a better user experience.
3. Creating the tasks list and main container
Now let’s create a function to render all tasks. It’s simply the for loop over the get_task function:
def get_tasks_layout(tasks_list):""" Returns the list of tasks """tasks = []for task_dict in tasks_list:task_layout = get_task(task_dict)tasks.append(task_layout)return tasks
We’ll wrap everything in a main container with a title and “Add a new ask” button:
def get_list_layout(list_data):""" Returns the list container with title and tasks """tasks_layout = get_tasks_layout(list_data["tasks_list"])content = dmc.Paper([dmc.Title(list_data["title"], order=2),# Tasks containerdmc.Container(tasks_layout,id="main_task_container",px=0, # No horizontal paddingmt="md", # Medium margin topmb="md", # Medium margin bottom),# Add task buttondmc.Button("Add a new task",id="new_task_button",style={"width": "100%"},variant="outline",color="gray",)],shadow="sm", # Light shadowp="md", # Medium paddingmt="md", # Medium margin topradius="sm", # Slightly rounded corners)return content
4. Styling with CSS
DMC already brings a set of default style sheets, which make us gain a lot of time. But as said previously, we want our we want our task inputs to look clean and minimal, with appropriate visual feedback for user interactions:
So we create a style.css file in the assets/ folder. This will be loaded automatically by Dash:
/** Filepath: ./assets/style.css*/.shadow-input {display: inline-block;width: 100%;margin: 0;border: 1px solid black;border-color: transparent;border-radius: 5px;}.shadow-input:hover {border-color: gray;}.shadow-input:active, .shadow-input:focus {border-color: black;}.task-container:has(.mantine-Checkbox-root[data-checked]) .mantine-Text-root input {text-decoration: line-through;color: gray;}.task-del-button:hover {color: red;}
This CSS does several things:
- Makes inputs blend seamlessly into the layout with transparent borders
- Shows subtle borders on hover and focus for better UX
- Applies strikethrough styling to checked tasks
- Adds a red hover effect to delete buttons
A key design decision here is handling the strikethrough effect with CSS rather than callbacks. By using the :has() selector to detect checked checkboxes, we can apply the strikethrough style directly in CSS. This is more efficient than using a callback, as it eliminates unnecessary round-trips to the server and provides instant visual feedback.
5. Running the app
Now let’s put everything together and start our application:
import dash_mantine_components as dmcfrom dash import Dash, _dash_renderer, dccfrom dash_iconify import DashIconify_dash_renderer._set_react_version("18.2.0") # for mantine# sample_list_data = ...## Layout functions:# get_task()# get_tasks_layout()# get_list_layoutapp = Dash(__name__)app.layout = dmc.MantineProvider(dmc.Container(get_list_layout(sample_list_data),size=400, # Container width))# Start the serverif __name__ == '__main__':app.run_server(debug=True)
When you run this code, you’ll have a basic task list application without interactivity yet:
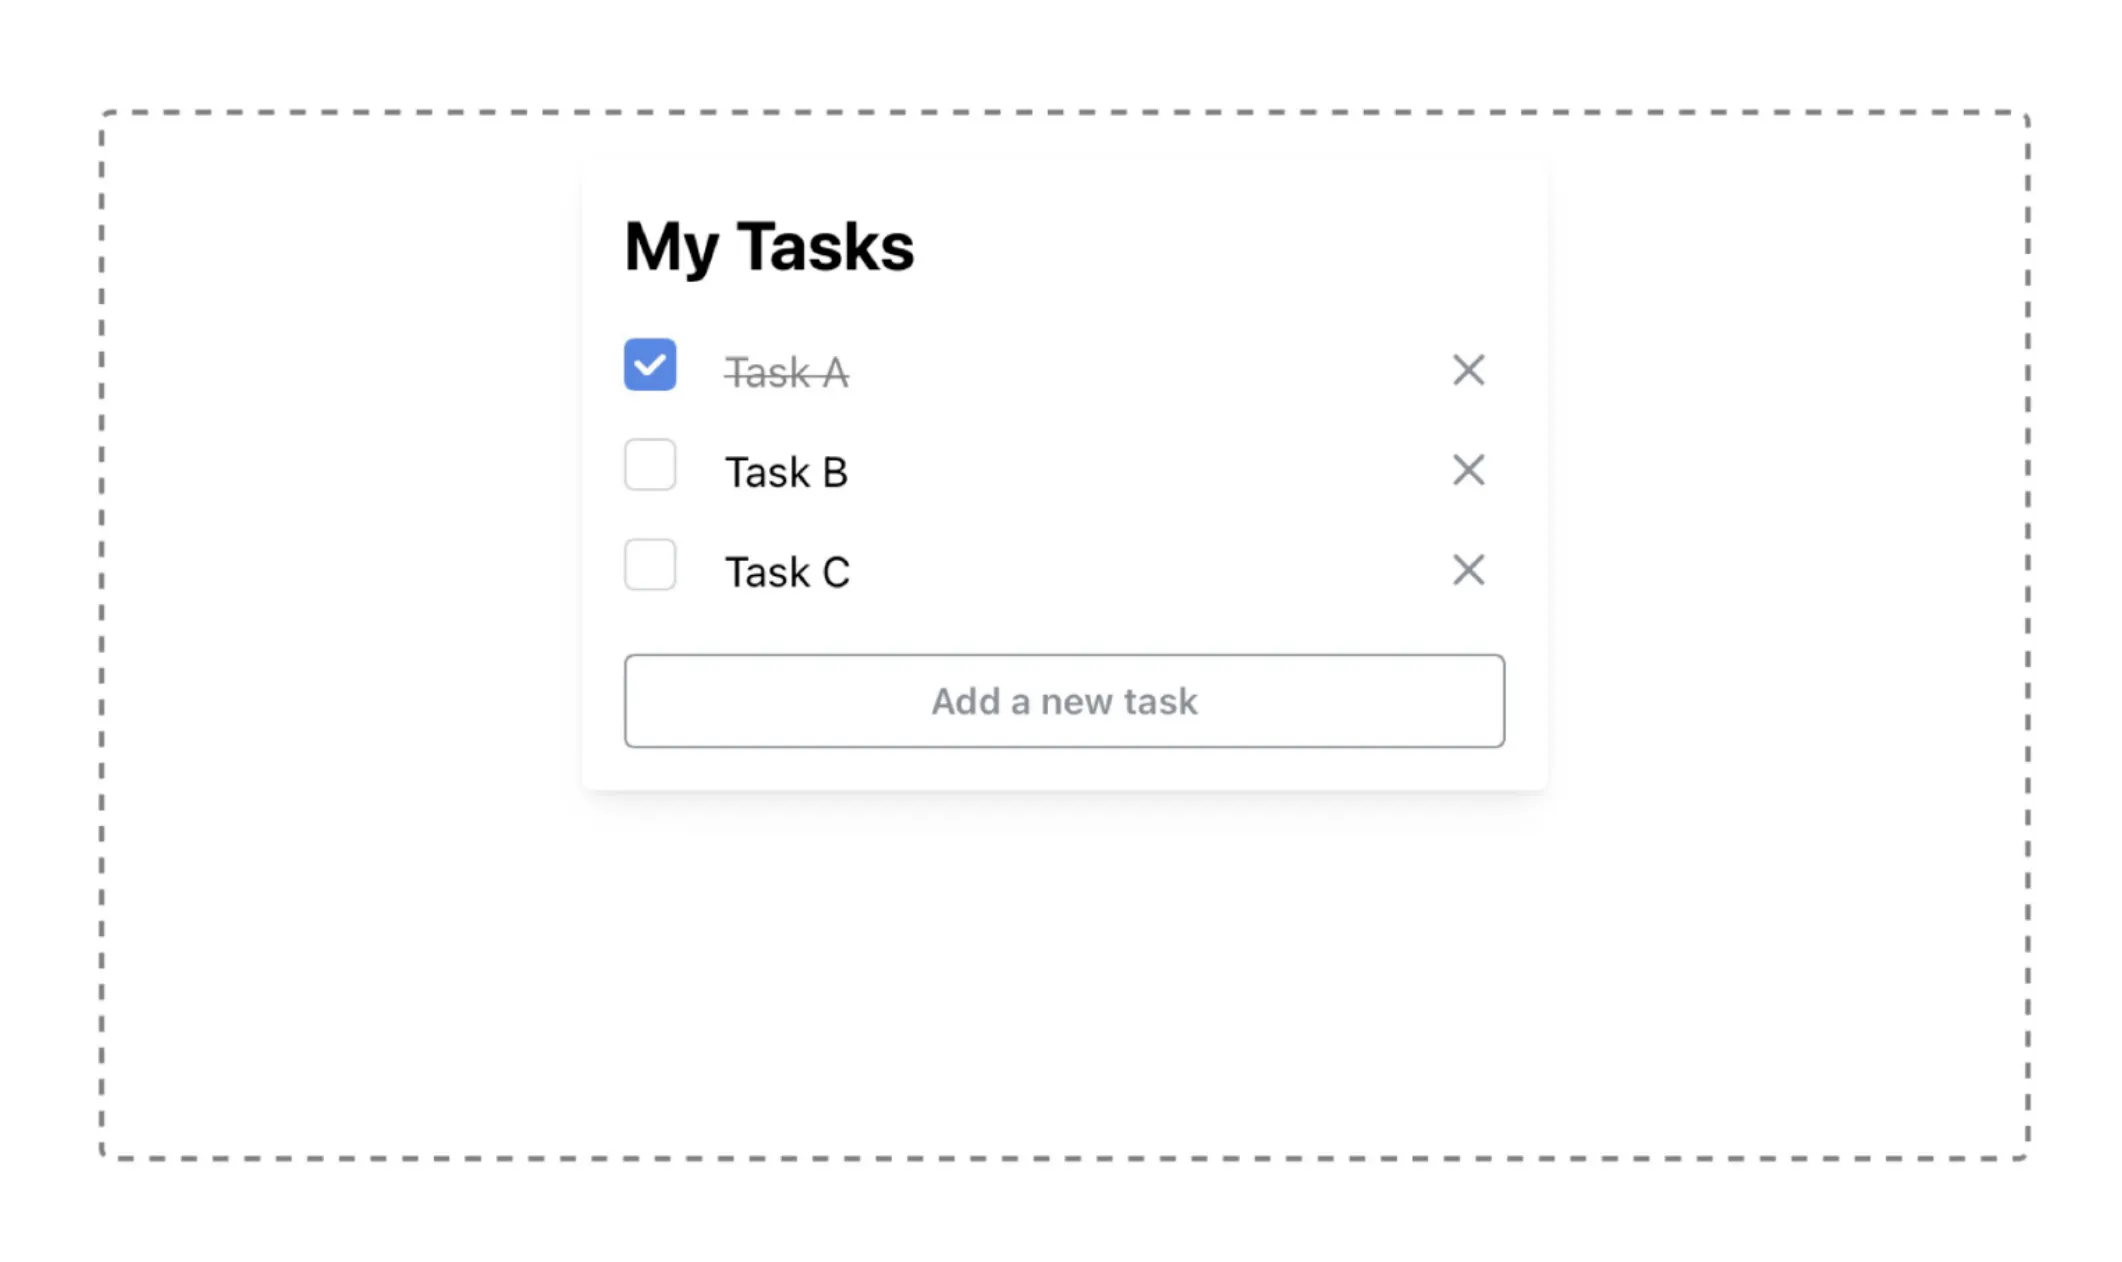
-> See the full code on Github or open the app.
Now that we have our layout defined, we can make it interactive with callbacks.
Step 2: Adding interactivity with callbacks
Now comes the interesting part. We need to make our tasks interactive – we need to handle creating, reading, updating, and deleting tasks (CRUD operations). However, we face an interesting challenge: how do we handle callbacks for elements that don’t exist when the app starts?
In regular Dash callbacks, you must define both inputs and outputs statically – they need to exist when the app initializes. This works fine for static elements like a single button or dropdown. But in our task app, we’re dynamically adding and removing tasks! These elements don’t exist when the app starts running.
This is where pattern-matching callbacks come in. Instead of targeting specific IDs like “button-1” or “task-input-2”, pattern-matching callbacks let us define patterns that match multiple components, even ones created after the app starts running. They work by using a dictionary-based ID system and special selectors like ALL.
For example, compare these two approaches:
# Regular callback - Only works for a specific, existing button@app.callback(Output("static-div", "children"),Input("submit-button", "n_clicks"))# Pattern-matching callback - Works for ANY button matching the pattern@app.callback(Output({"type": "result", "id": ALL}, "children"),Input({"type": "submit", "id": ALL}, "n_clicks"))
The pattern-matching version uses a dictionary for the ID with two keys:
- “type”: Groups similar components (like all submit buttons)
- “id”: Uniquely identifies each instance
Now we can write a single callback that handles all tasks of the same type, even ones created dynamically after the app starts! When we add a new task with ID {"type": "task", "id": "123"}, the callback will automatically work for it.
This is perfect for our task app where we need to add and remove tasks dynamically. Let’s continue.
Learn more on Pattern-Matching callbacks from the Dash Plotly documentation: https://dash.plotly.com/pattern-matching-callbacks
1. Adding unique identifiers
As Pattern-Matching callbacks need a unique id, we need to modify our data structure to include unique identifiers for each task. Let’s add an index field using UUID:
import uuidsample_list_data = {"title": "My Tasks","tasks_list": [{"index": uuid.uuid4().hex, # Add unique identifier"content": "Task A","checked": True,},# ... other tasks],}
Example UUID: f4da57942cec46b7ba448c88fad11996. We could as well have used integers. It doesn’t matter as long as the ids are unique.
Now we need to update our get_task function to use these identifiers:
def get_task(task_dict):""" Returns a single task layout """text = task_dict["content"]checked = task_dict["checked"]index = task_dict["index"] # Get the indexcontent = dmc.Grid([dmc.GridCol(dmc.Checkbox(id={"type": "task_checked", "index": index}, # Add IDchecked=checked,mt=2),span="content"),dmc.GridCol(dmc.Text(dcc.Input(text,id={"type": "task_content", "index": index}, # Add IDclassName="shadow-input",debounce=True,)),span="auto"),dmc.GridCol(dmc.ActionIcon(DashIconify(icon="tabler:x", width=20),id={"type": "task_del", "index": index}, # Add IDvariant="transparent",color="gray",className="task-del-button"),span="content"),],className="task-container")return content
We now have a unique index on the three interactive components: the checkbox, the input and the delete button. Let’s write the callbacks.
2. Adding new tasks
Now we can implement the “Add Task” functionality using callbacks:
@app.callback(Output("main_task_container", "children", allow_duplicate=True),Input("new_task_button", "n_clicks"),State("main_task_container", "children"),prevent_initial_call=True,)def add_task(n_clicks, current_tasks):""" Adds a task to the list """if not n_clicks:raise PreventUpdate# Create new task with unique IDnew_index = uuid.uuid4().hextask_dict = {"index": new_index,"content": "","checked": False,}task_layout = get_task(task_dict)# Add new task to current tasksupdated_tasks = current_tasks + [task_layout]return updated_tasks
This callback is triggered when the new_task_button is clicked. It basically takes the existing list of tasks that are in main_task_container and adds a new, empty, task inside. Then it returns the new list.
We added prevent_initial_call=True to avoid running this callback when the app is loaded (the default behavior), as we know that this callback should only be triggered on a button action. It reduces unnecessary work and HTTP requests.
We also check the n_clicks is a valid positive value, in case that the callback gets triggered anyway. The raise PreventUpdate stops the callback execution.
Notice the allow_duplicate=True on the Output. It is mandatory as we will have many operations that will update the main_task_container component.
3. Removing Tasks
And finally, we implement the “Task deletion” callback following the same scheme:
@app.callback(Output("main_task_container", "children", allow_duplicate=True),Input({"type": "task_del", "index": ALL}, "n_clicks"),State("main_task_container", "children"),prevent_initial_call=True,)def remove_task(n_clicks, current_tasks):""" Remove a task from the list """if not any(n_clicks):raise PreventUpdateprint("Entering remove_task callback")task_index = ctx.triggered_id["index"]# Get the list of existing ids.all_ids = [elem["id"] for elem in ctx.inputs_list[0]]# Find the position of element in list and remove itfor i, task_id in enumerate(all_ids):if task_id["index"] == task_index:del current_tasks[i]breakreturn current_tasks
Here’s how it works:
- When a delete button is clicked, Dash triggers this callback. We use pattern matching with {"type": "task_del", "index": ALL} to catch clicks from any delete button in our tasks. Each button has a unique index we assigned earlier.
- The ctx.triggered_id tells us which specific delete button was clicked – specifically its index. This works because when the callback fires, Dash knows exactly which component triggered it.
- To find and remove the correct task, we need to:
- Get all delete button IDs using ctx.inputs_list[0] which contains the IDs of all components matching our pattern
- Map this to just get the ID dictionaries (each with a “type” and “index”)
- Find the position (index) in our task list that matches the triggered button’s index
- Delete that task from current_tasks using del
As seen previously, the prevent_initial_call=True and if not any(n_clicks) check ensures we don’t accidentally delete tasks when the app first loads or if the callback is triggered without a click.
4. Run the app
Let’s run the code again. We preferably place our callbacks before the app.run_server statement:
import uuidimport dash_mantine_components as dmcfrom dash import Dash, _dash_renderer, dcc, ctx, Input, Output, State, ALLfrom dash.exceptions import PreventUpdatefrom dash_iconify import DashIconify_dash_renderer._set_react_version("18.2.0") # for mantine# sample_list_data = ...## Layout functions:# get_task()# get_tasks_layout()# get_list_layoutapp = Dash(__name__)# app.layout = ..## Callbacks# add_task()# remove_task()# Start the serverif __name__ == '__main__':app.run_server(debug=True)
-> See the full code on Github or open the app.
You now have a fully working —yet basic— todo app. Congratulations!
Conclusion
Let’s recap what we covered in this article:
- An introduction to DMC (Dash Mantine Components) and its components
- How to use pattern matching callbacks for dynamic interactions
- How to use CSS styling in a Dash context
In the next part, we will see how to adapt this code to handle multiple lists and keep the tasks saved after page reloads (persistence).
I hope you enjoyed this first part of the tutorial!
If you have any questions, please join us on the dedicated topic on Plotly’s forum: here.